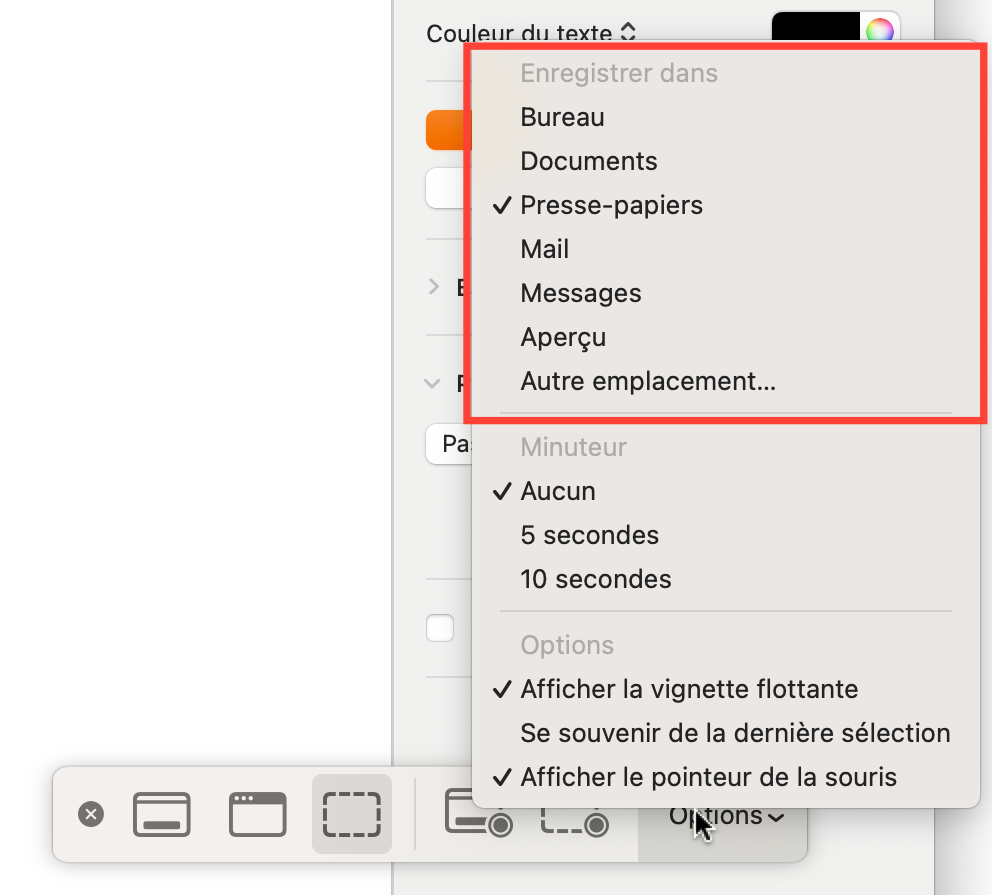
This short tutorial will guide you step-by-step through changing the folder in which you save your screenshots on your Mac. It’s a very easy setting to change, and one that can save a lot of time.
How do I take a screenshot on a Mac?
Before changing the destination folder for your screenshots, it’s important to know the different ways of taking them. The method is the same on all Macs(Macbook Air, Pro, Mini, iMac…).
With keyboard shortcuts:
- To capture the whole screen: Shift + Command + 3
- To capture a part of the screen: Shift + Command + 4 and select the part of the screen you want to capture.
- To capture a window or defined area: Shift + Command + 4 + Space.
With trackpad or mouse:
Open the “Screen Capture” application on the Launchpad or via Spotlight search (the F4 button or the magnifying glass at the top of the screen). Once you’re on the application bar, you can take a screenshot in any way you like. It’s also possible to take a screenshot using the Touch Bar on Macbook Pros.
Change the folder in which you save screenshots.
To change the destination folder for screenshots, you need to open the Screenshots application.


