In this tutorial, I’ll explain what you need to do to find out the refresh rate of your Windows screen, whether for gaming or professional use. The refresh rate of your screen is the number of times an image is refreshed on your monitor or laptop screen, per second. To give you an example, if you have a 144 Hz display, this means that the images displayed on your screen will be refreshed 144 times per second. The higher the refresh rate, the better your gaming and video-viewing experience. On the other hand, a lower refresh rate causes the screen to flicker, and can more easily lead to eyestrain and headaches. Windows gives you the option of changing the monitor refresh rate, allowing you to make the most of your hardware specifications. Before doing so, however, it’s important to know the refresh rate supported by your monitor.
1. Checking refresh rate with DirectX
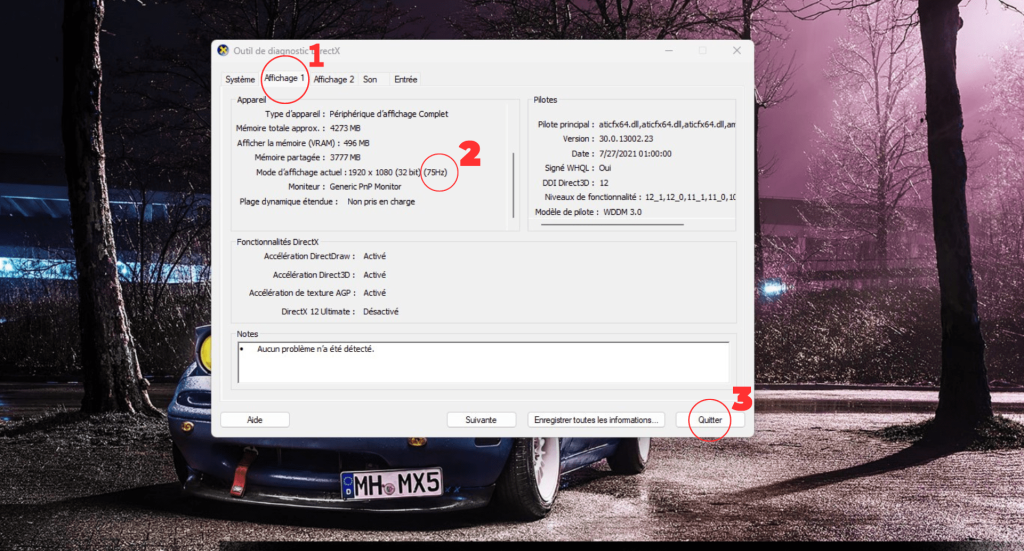
DirectX Diagnostic Tool is a troubleshooting tool for graphics and sound problems, but also for checking your PC’s hardware specifications. Here’s how to use DXDIAG under Windows 11 to find out your monitor’s refresh rate:
- Press Windows + R to open the “Run” function(Windows + R).
- When done, type dxdiag and press Enter
- Go to the “Display” tab
- Find the “Current display mode” section, and your refresh rate will be indicated
2. Check refresh rate from Windows 10 and 11 settings
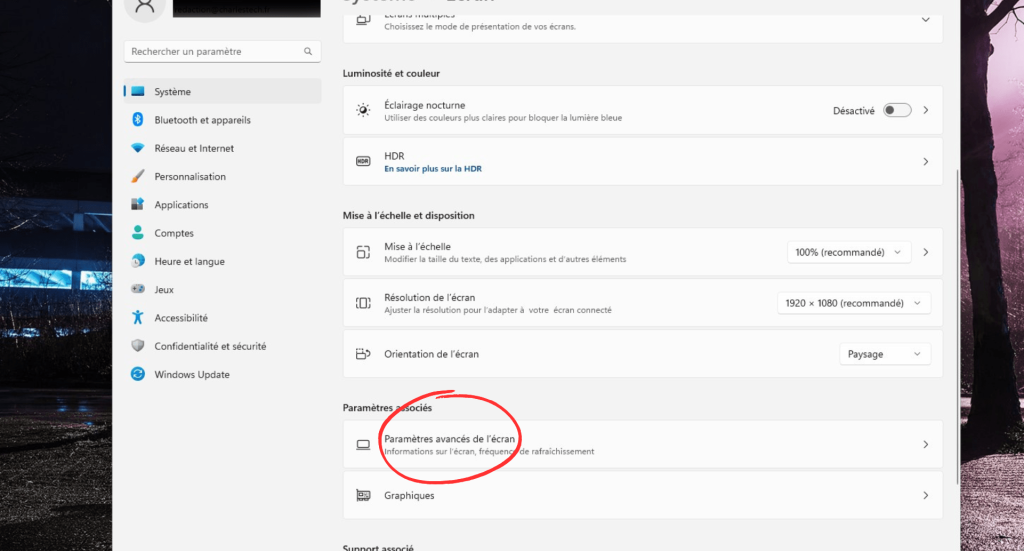
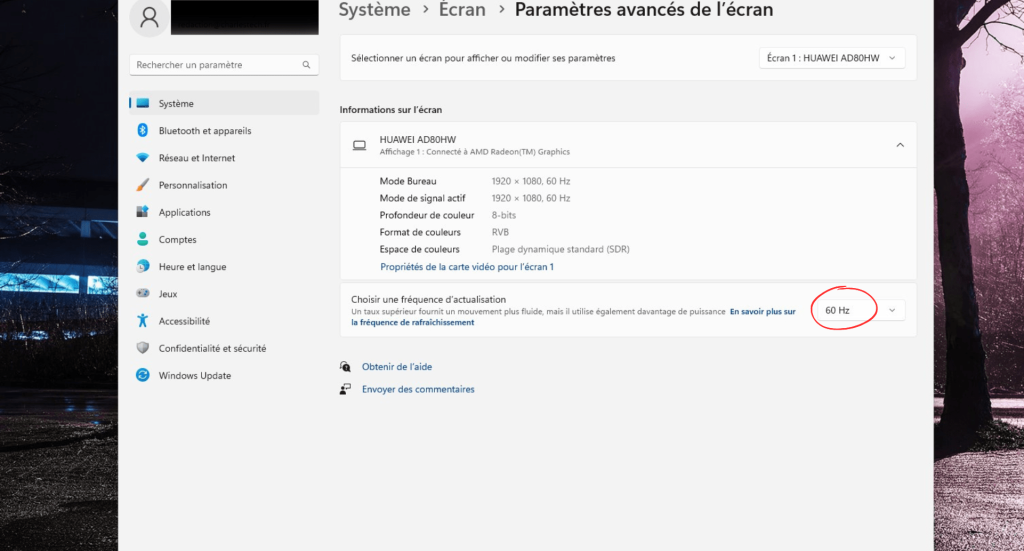
Windows 11 display settings also include the screen refresh rate, but it’s hidden. Here’s how to find it:
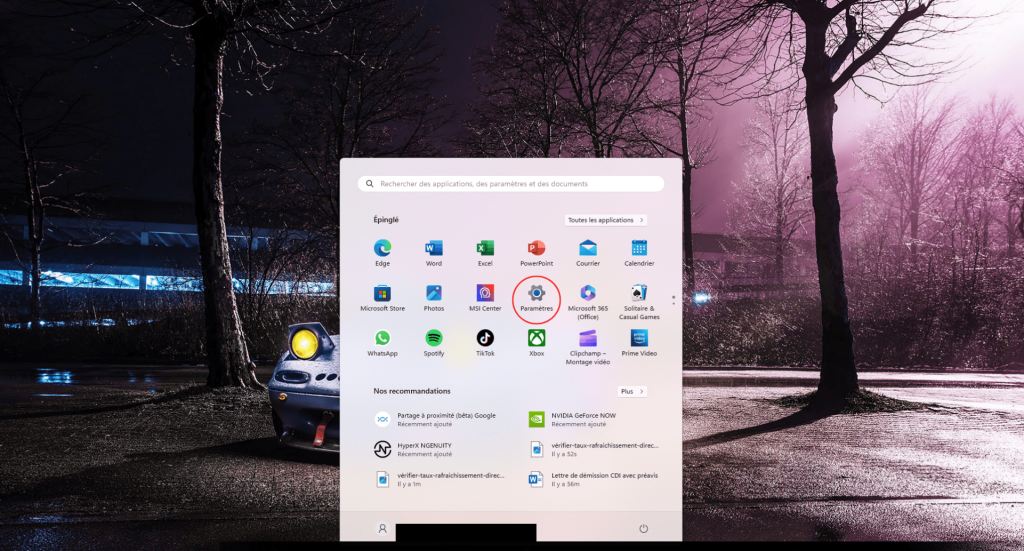
- Press the Windows key, then go to Settings
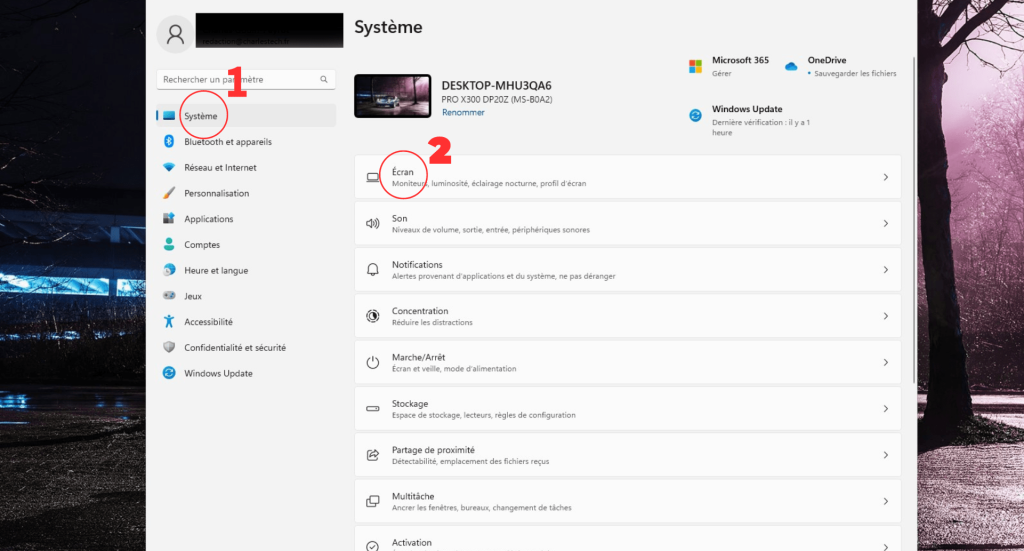
- Then go to the “System” section
- Then click on “Screen”.
- Scroll down to find the related settings and click on “Advanced screen settings”
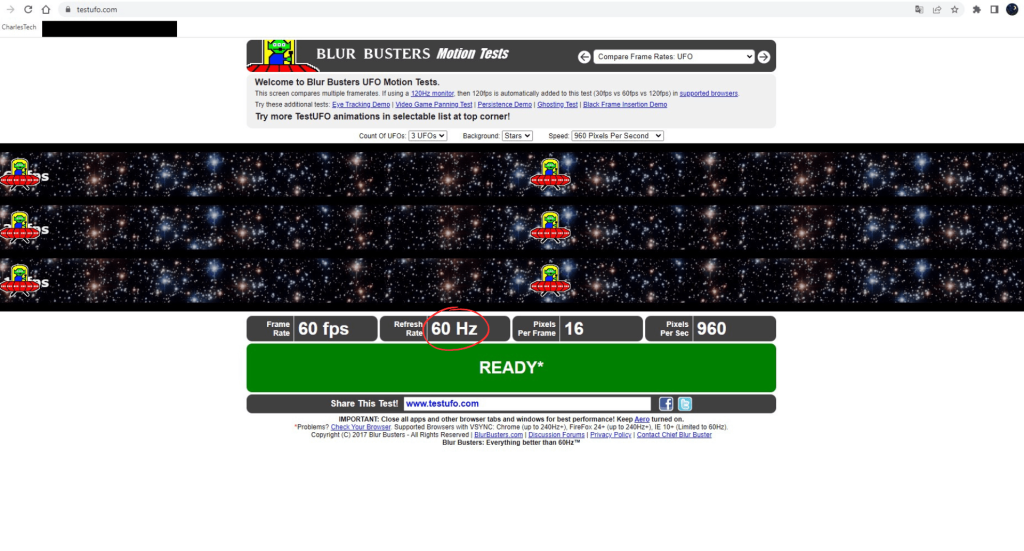
3. Check refresh rate with TestUFO
TestUFO is a site that displays frame rate, refresh rate, number of pixels per frame and number of pixels per second.
