IPv6 is the sixth version of the Internet Protocol (IP), which defines how data is sent and received on the Internet. UnlikeIPv4, which uses 32-bit IP addresses,IPv6 uses 128-bit addresses, allowing a considerably larger number of unique addresses to be created for devices connected to the Internet. Windows 11 allows you to disable IPv6 in three different ways, which are presented in this tutorial.
How do I disable IPv6 from Settings in Windows 11?
To disable IPv6 on Windows 11 from your settings, simply follow these steps. Here’s how:
- Open Settings
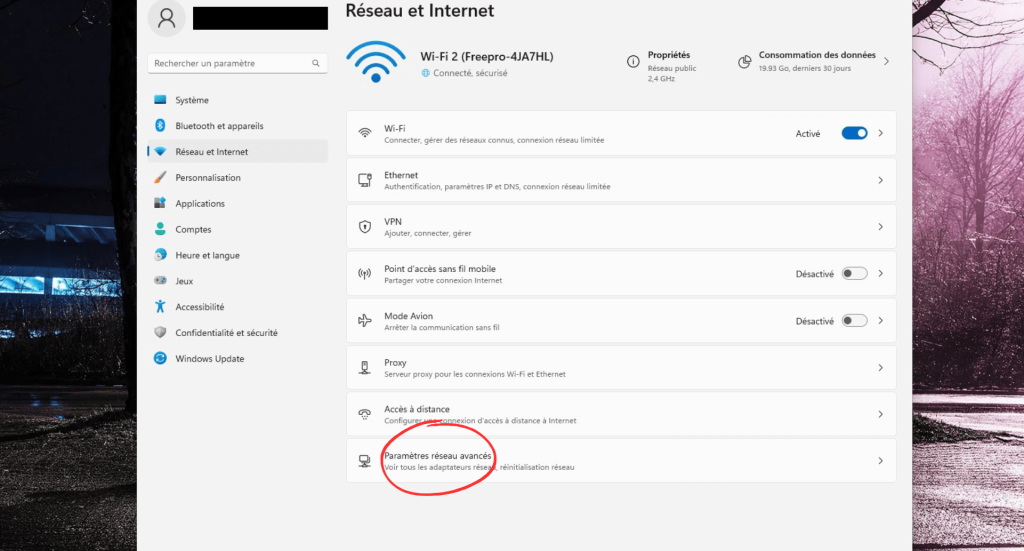
- Click on the “Network and Internet” section
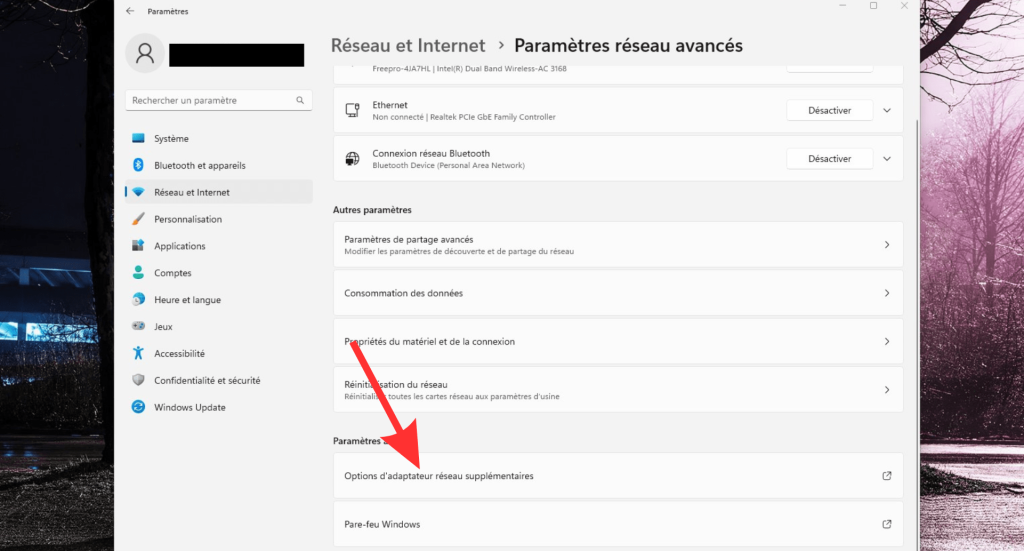
- Click on “Advanced Network Settings”.
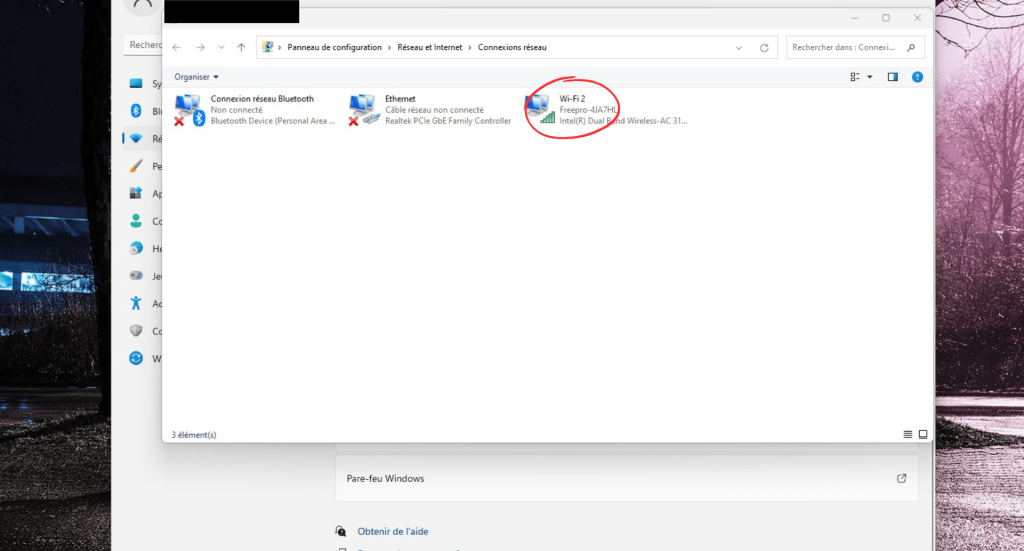
- Then go to “Additional network adapter options”.
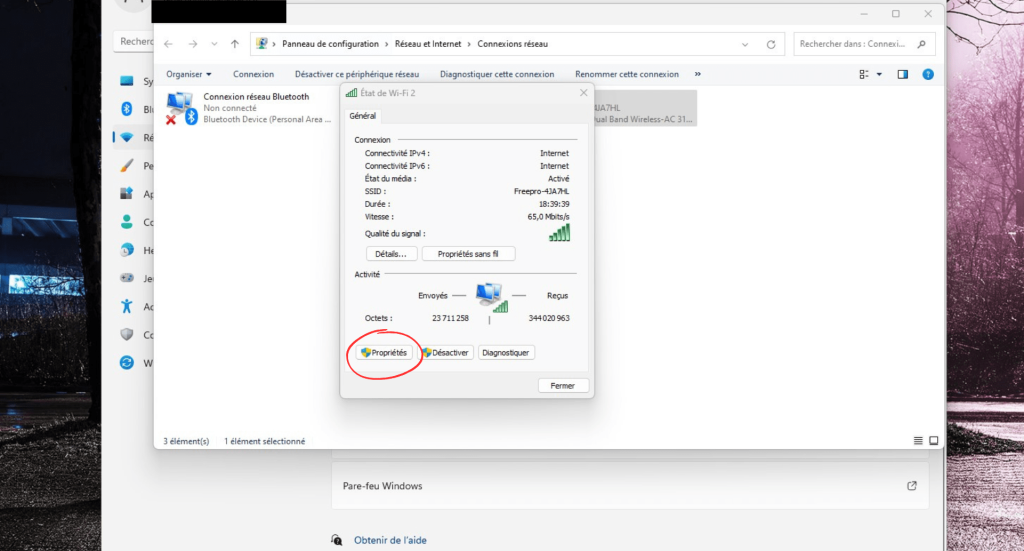
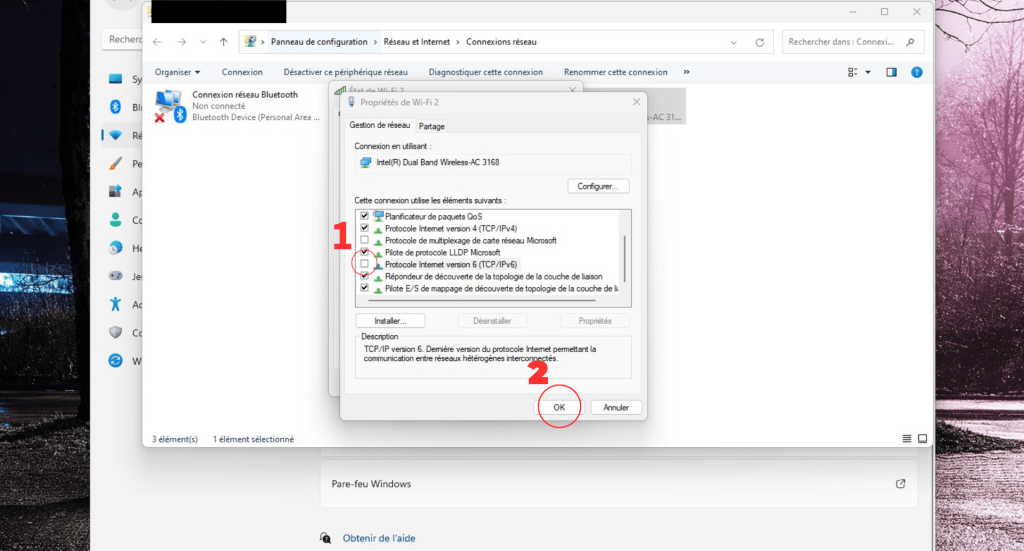
- Select the network you’re connected to, then click on “Properties”.
- Look for the “Internet Protocol version 6” section and uncheck the box
- Click on “OK”.
How do I disable IPv6 via the Windows 11 command prompt?
We’d like to remind you that for this method, you need to use the command prompt, which is not without risks if the task is not carried out correctly. We therefore recommend that you create a backup of your device before proceeding. To do so :
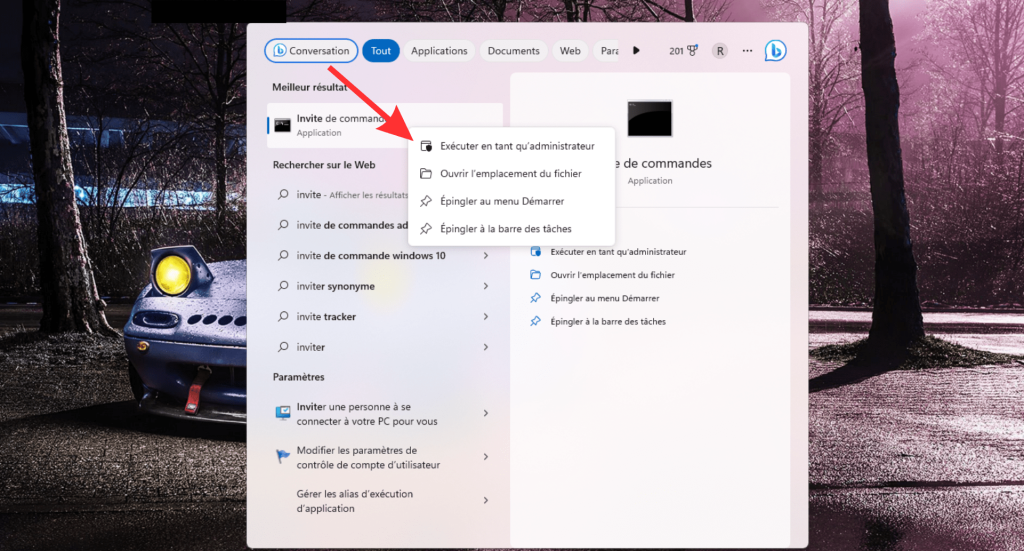
- Search for “Command Prompt” in the “Search” section of Windows
- Right-click on the application and run it as administrator
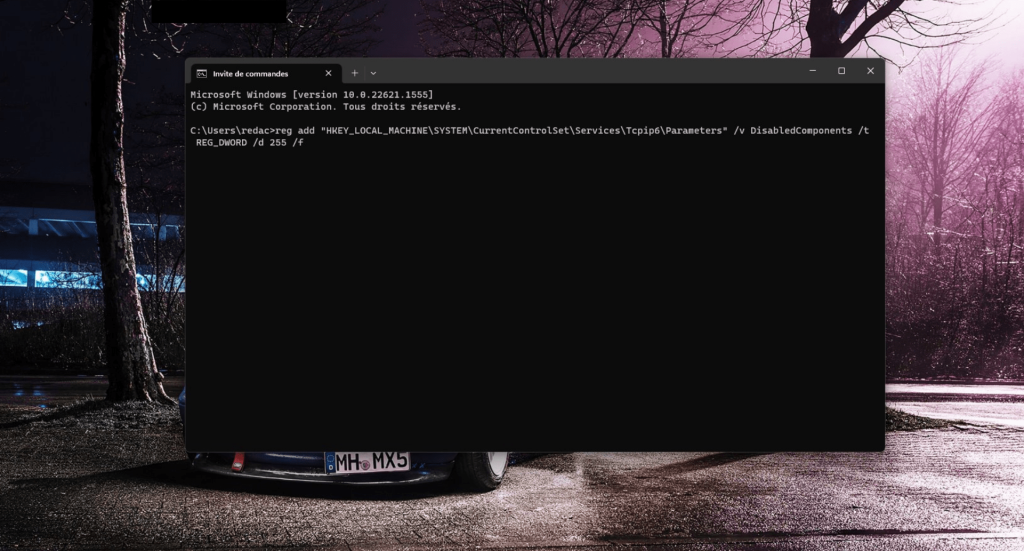
- Type the command “reg add “HKEY_LOCAL_MACHINESYSTEMCurrentControlSetServicesTcpip6Parameters” /v DisabledComponents /t REG_DWORD /d 255 /f” and press Enter .
- Restart the PC
How do I disable IPv6 from Powershell on Windows 11?
If you’d like to use Powershell to disable IPv6 on your device, follow these steps in order:
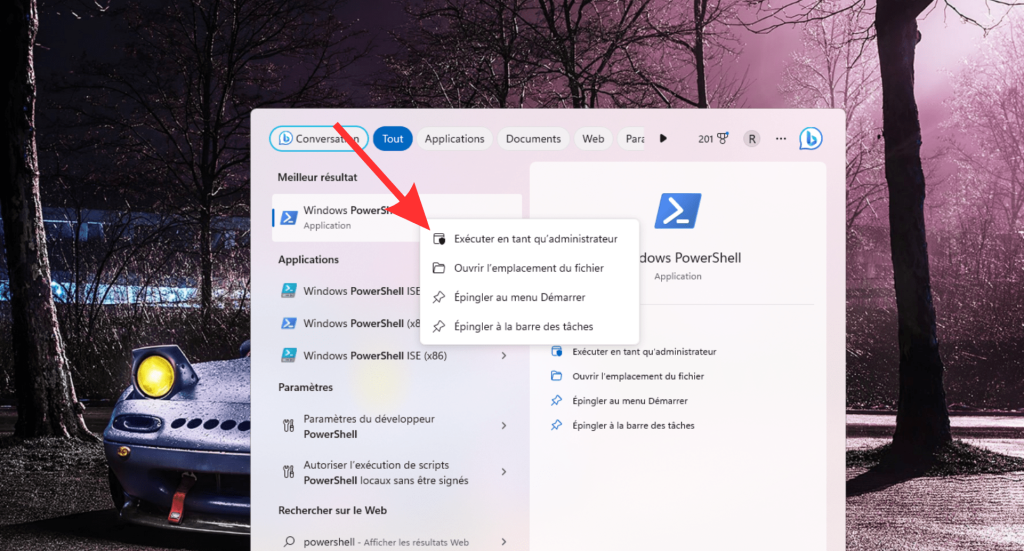
- Search for “Powershell” in the “Search” section of Windows 11
- Right-click on the application and run it as administrator
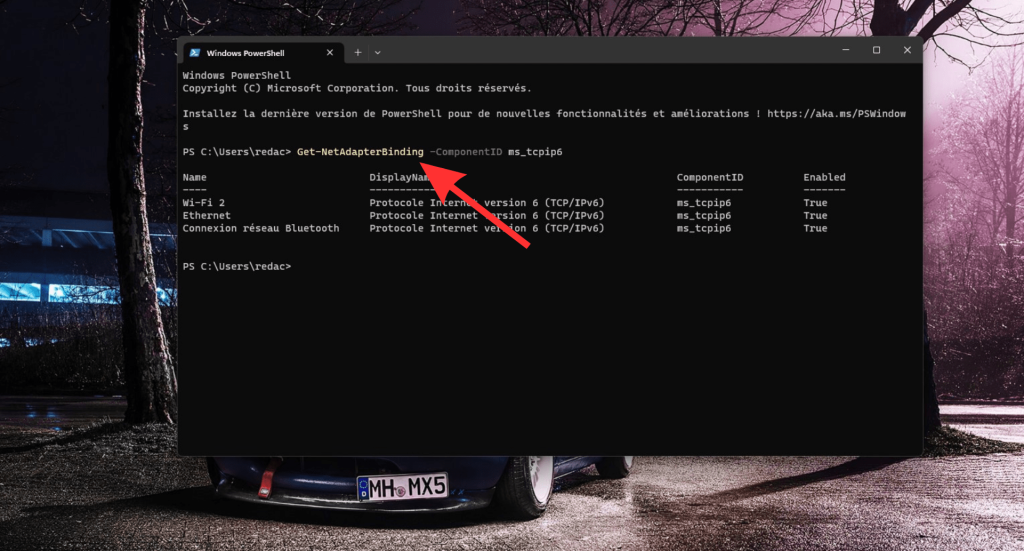
- Type the command “Get-NetAdapterBinding -ComponentID ms_tcpip6” and press Enter
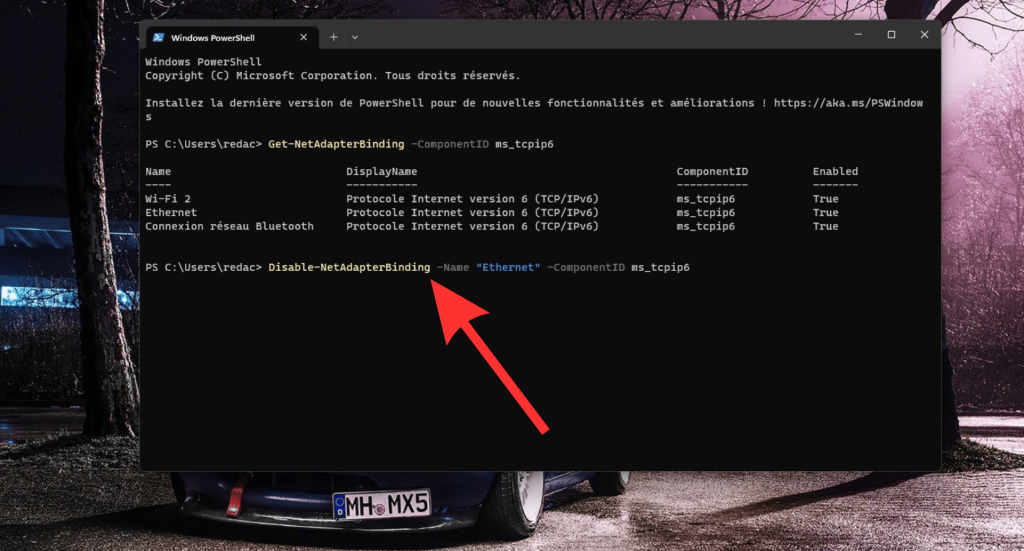
- Next, type the command “Disable-NetAdapterBinding -Name “Ethernet” -ComponentID ms_tcpip6″ to disable IPv6 and press Enter


