At some point, it’s common to encounter problems with your computer, and it can happen that a specific application suddenly stops working. If you’ve ever been faced with this situation, Windows 11 offers a feature that lets you repair your applications without having to uninstall and reinstall them. However, it’s important to note that only applications distributed through the Microsoft Store can be repaired or reset. This means that not all applications will be supported by this feature. For older applications, you’ll need to uninstall and reinstall them to get them working again, although some of them offer a repair option built into their uninstall program. How do I repair or reset a modern Windows 11 application?
- Open the Start menu.
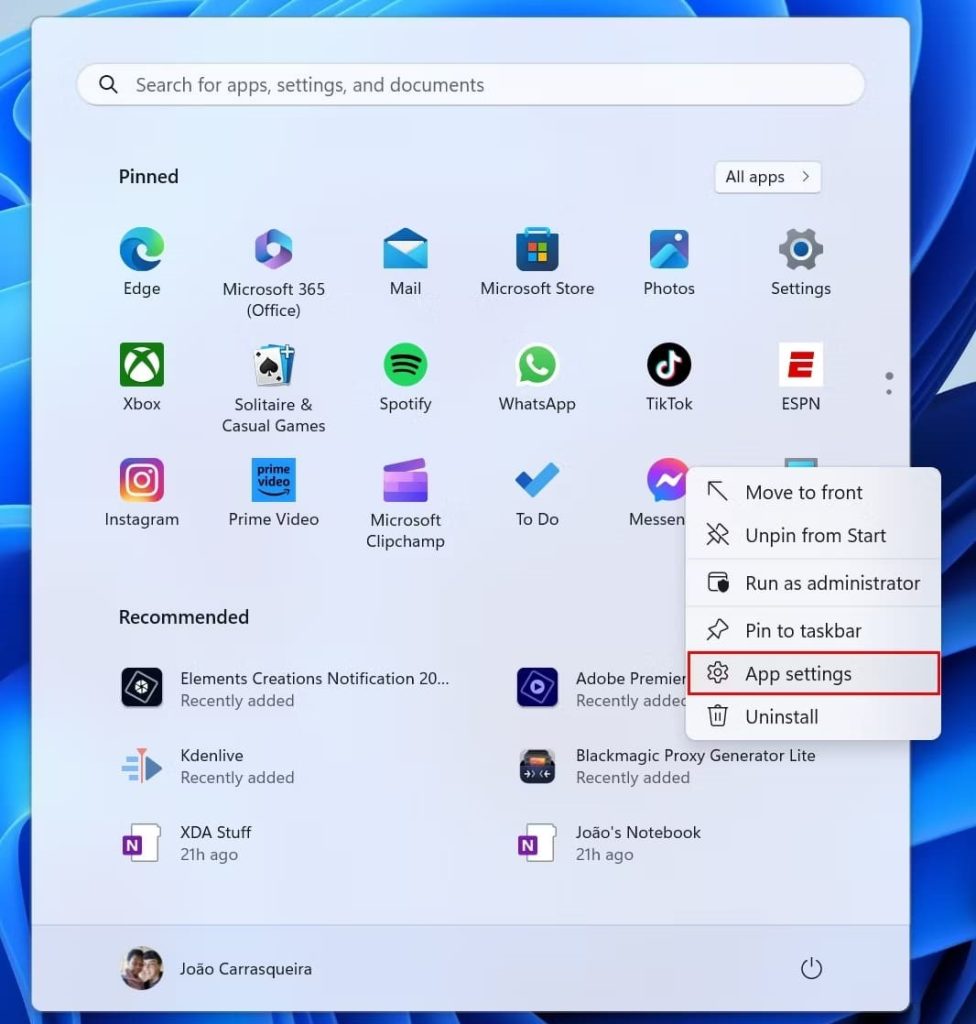
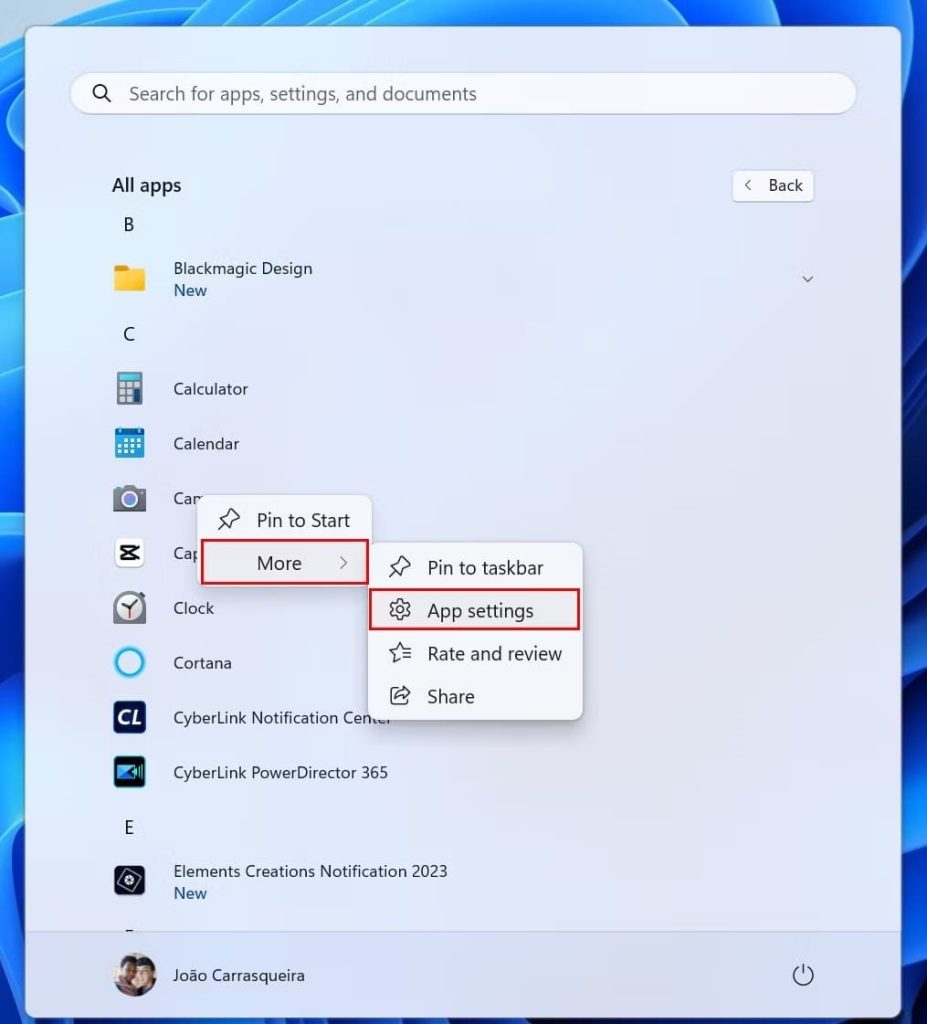
- If the desired application is pinned, right-click on the application icon and choose Application settings. If not, click on the All applications button, then search for the application in the list. Right-click on the application and choose More > Application settings .
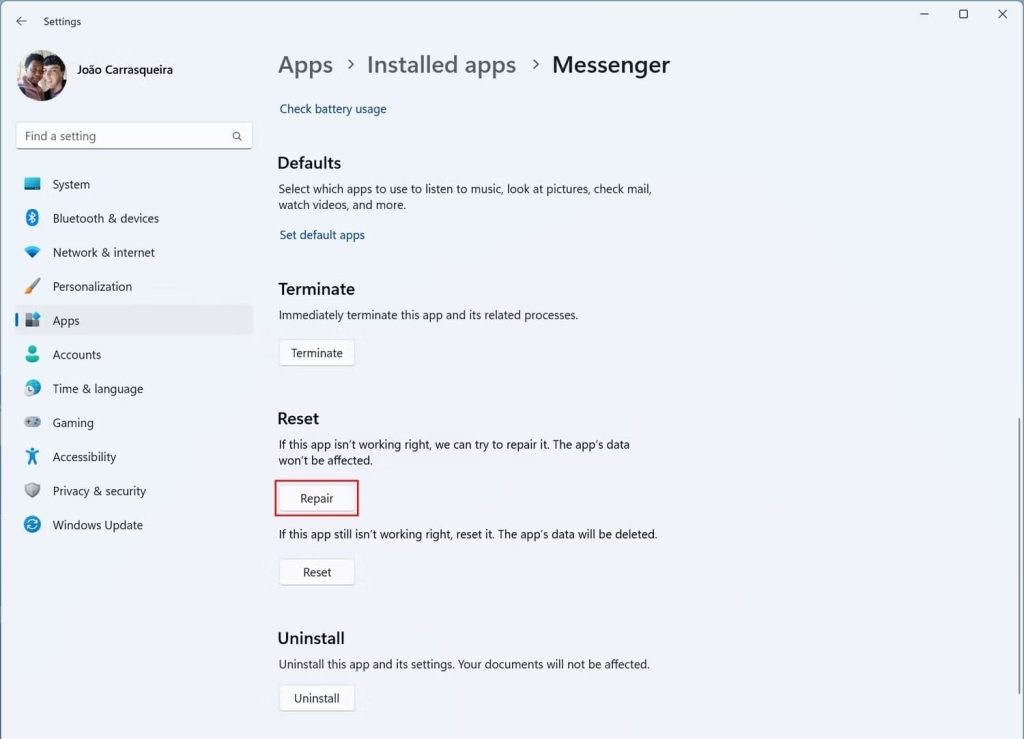
- Scroll down to the Reset section and click on Repair to try to repair the application without losing your data.

- Wait for the process to finish and try opening the application again. If it works again, you’ve succeeded.
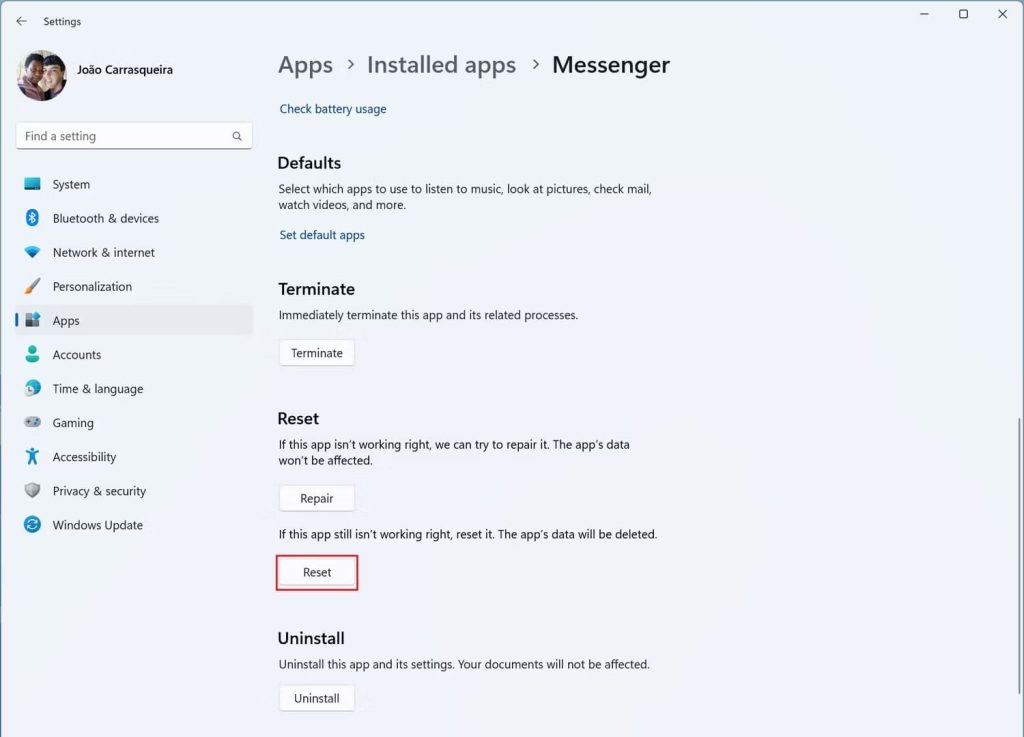
- If it doesn’t, go back to the Settings application and this time click on Reset.

- Wait for the procedure to finish.
The application’s default settings will be restored, without your personal data, and it should work again. If this is not the case, the problem you’re experiencing may be linked to a bug in the application or in Windows.


