These days, we have such a vast collection of applications for Windows 11 that it’s very easy to install too many. It’s even easier to find a bad application you don’t want to use. Uninstalling apps on a Windows PC used to be tricky, but it’s become a lot easier with Windows 11 Although it’s not the same as disabling apps on your Android phone, removing apps on Windows 11 is a straightforward process. There are several ways to do it, and you can choose your method according to your preferences. Here’s how to uninstall apps from Windows 11.
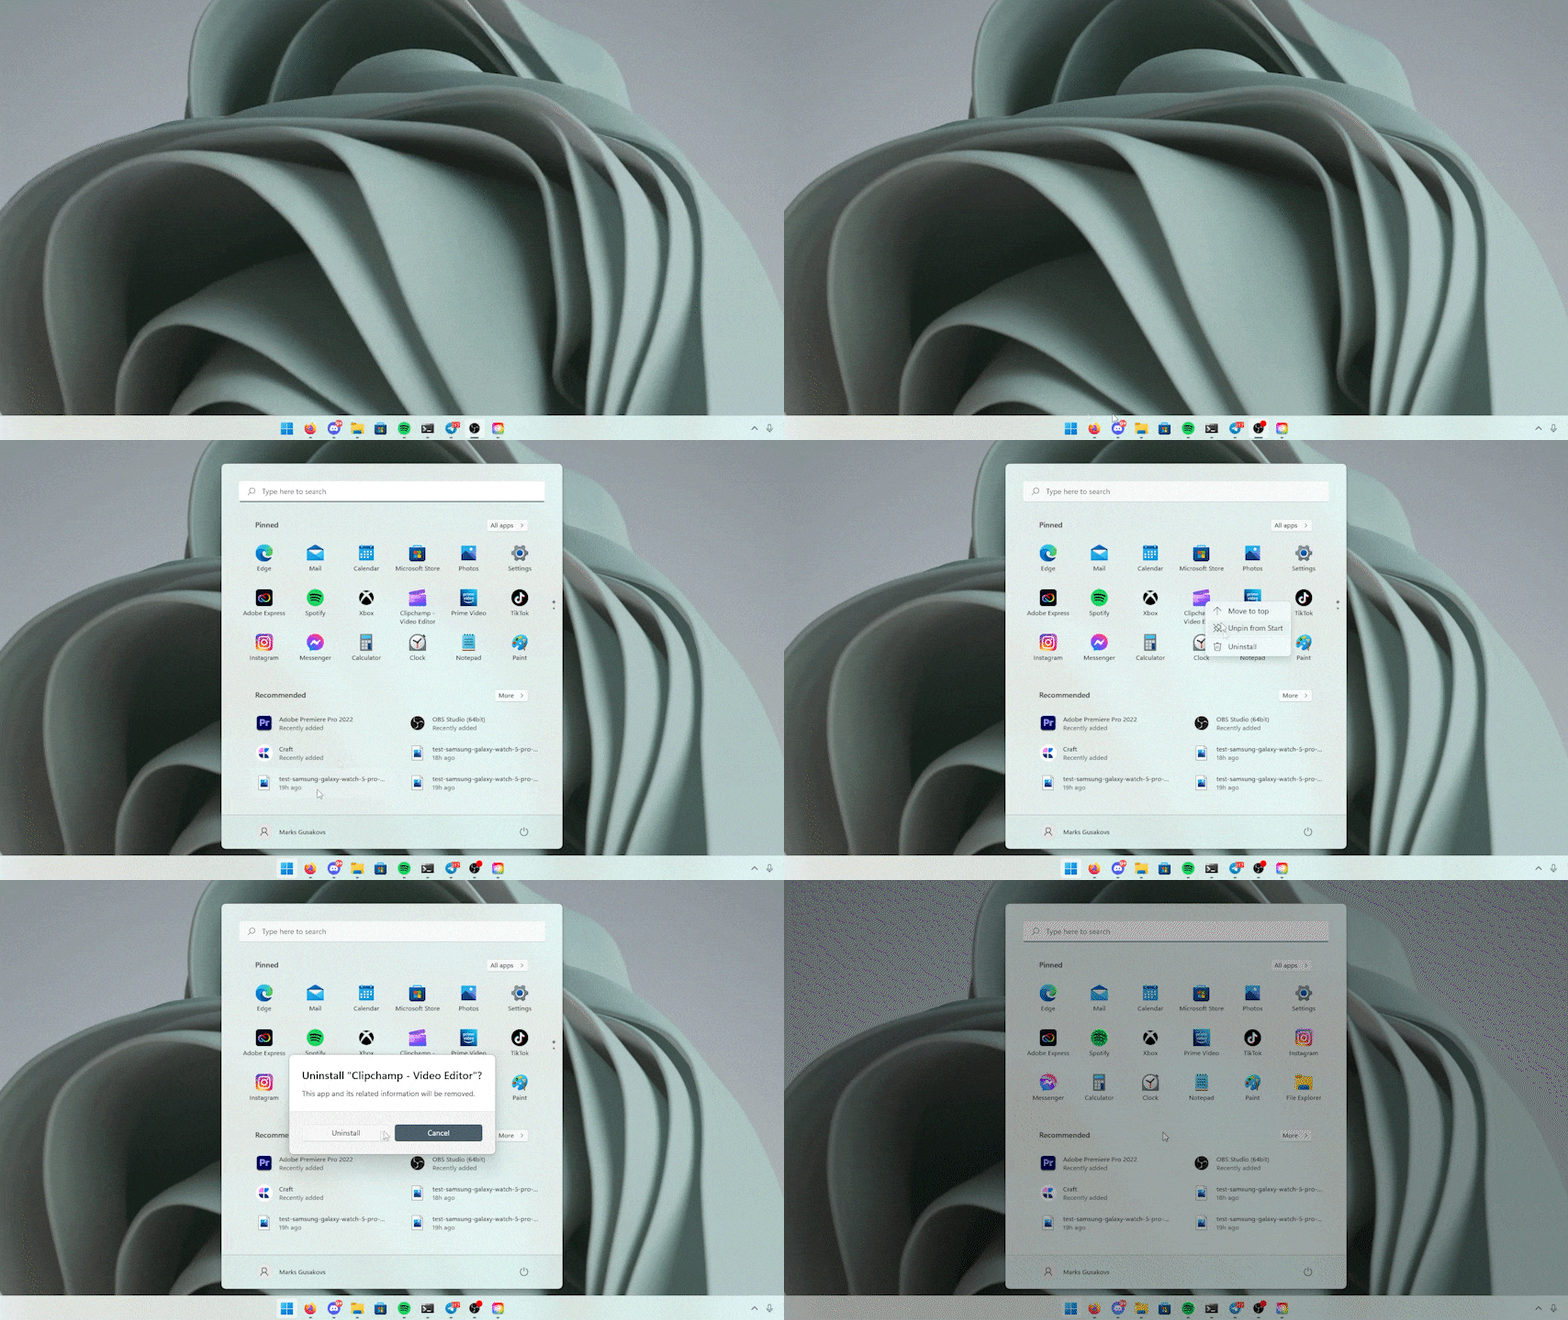
Uninstalling an application from the Windows 11 Start menu
This is the quickest way to uninstall applications from Windows 11. The Start menu has been slightly modified with Windows 11, and uninstalling applications from this menu is now possible. Follow the steps below.
- Click on the Start button to bring up the Start menu.
- Click on the All Applications button in the top right-hand corner of the Start menu.
- Right-click on the application you wish to uninstall, then click Uninstall.
- If a confirmation window appears, click Uninstall to confirm.
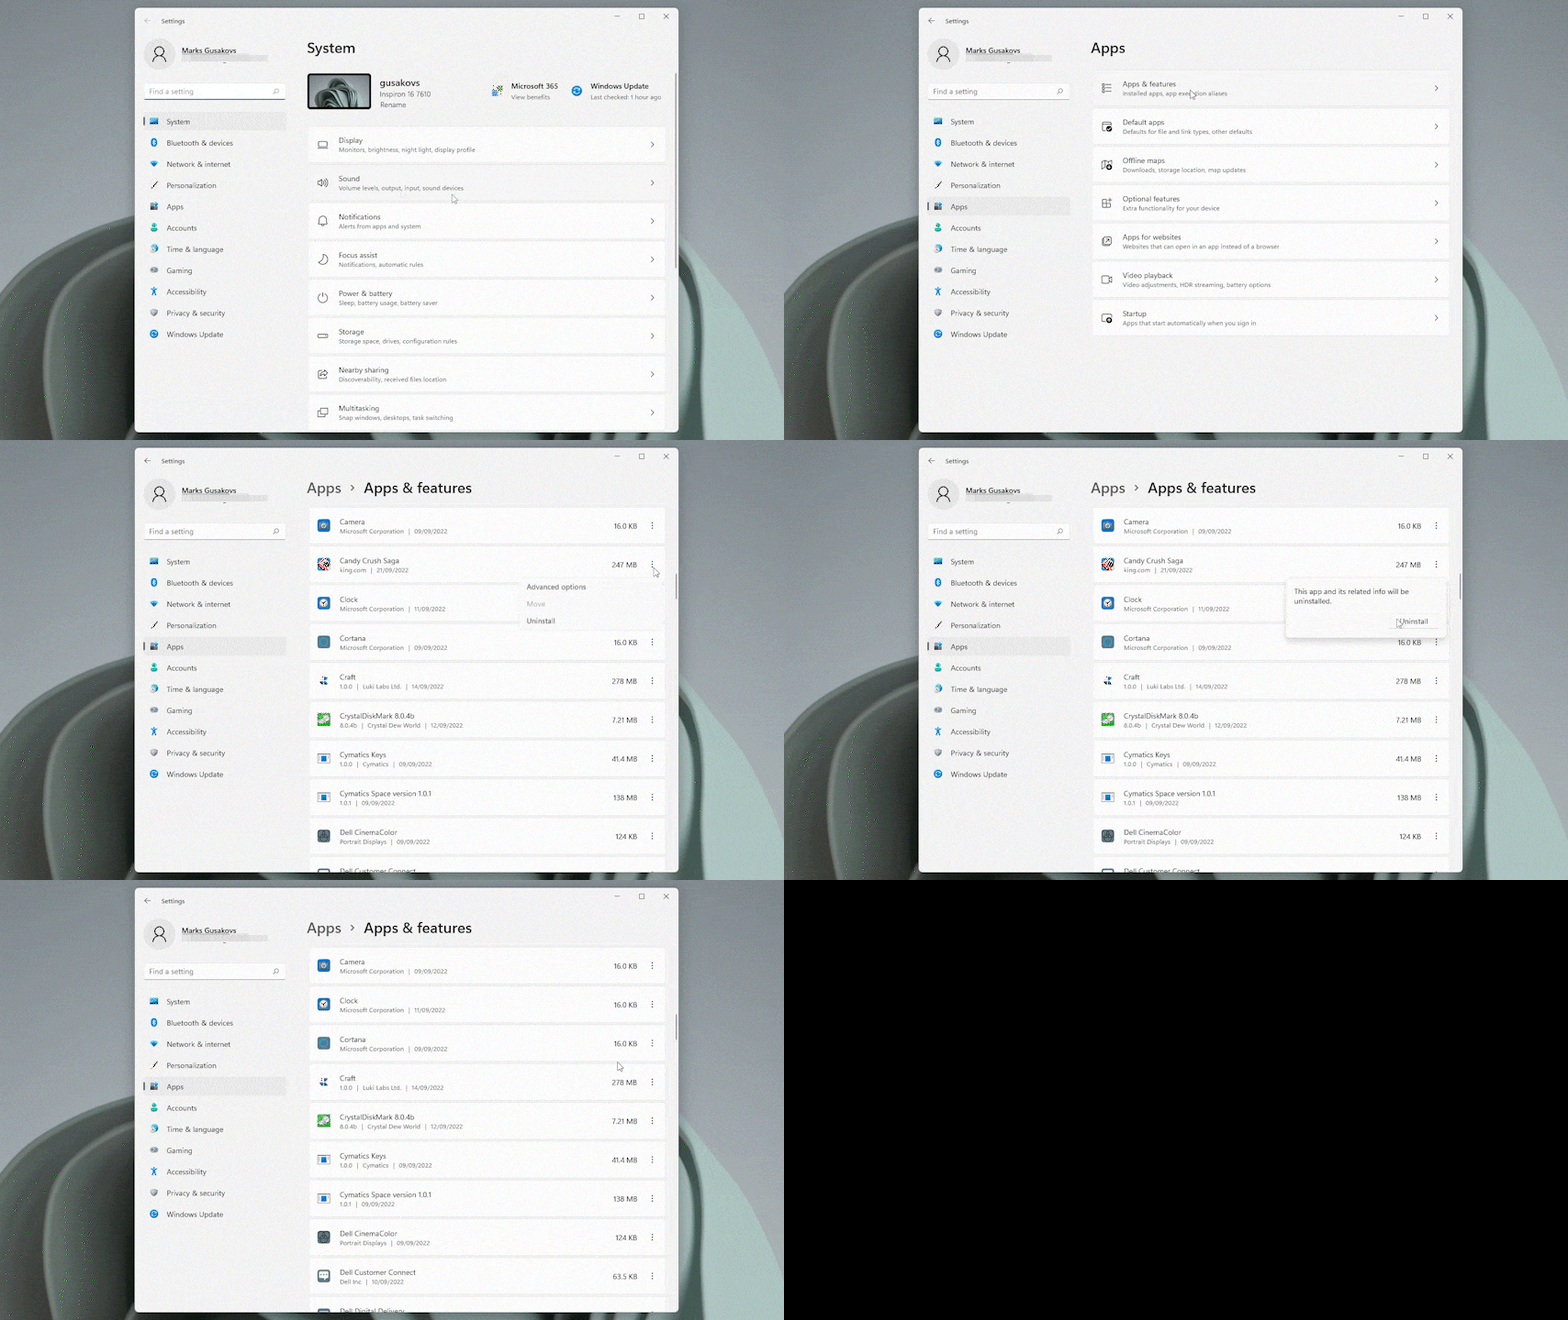
Remove an application using Windows 11 settings
If your application can’t be uninstalled from the Start menu, you can go to Settings. Here you can also see a complete list of all the applications installed on your computer.
- Open the Settings application by searching for it in Windows Search.
- Click on the Apps tab in the left-hand navigation pane.
- Click on the Apps & Features button in the right-hand pane.
- Click on the three-dot menu button next to the application, then click on Uninstall.
- The uninstall wizard will open, asking for your permission to run it. Click Yes to continue.
- Follow the Uninstall Wizard instructions to complete the uninstallation of the application.
If you still can’t uninstall the application, you can use the oldest but most radical method. To do this, you’ll need to use the Control Panel.
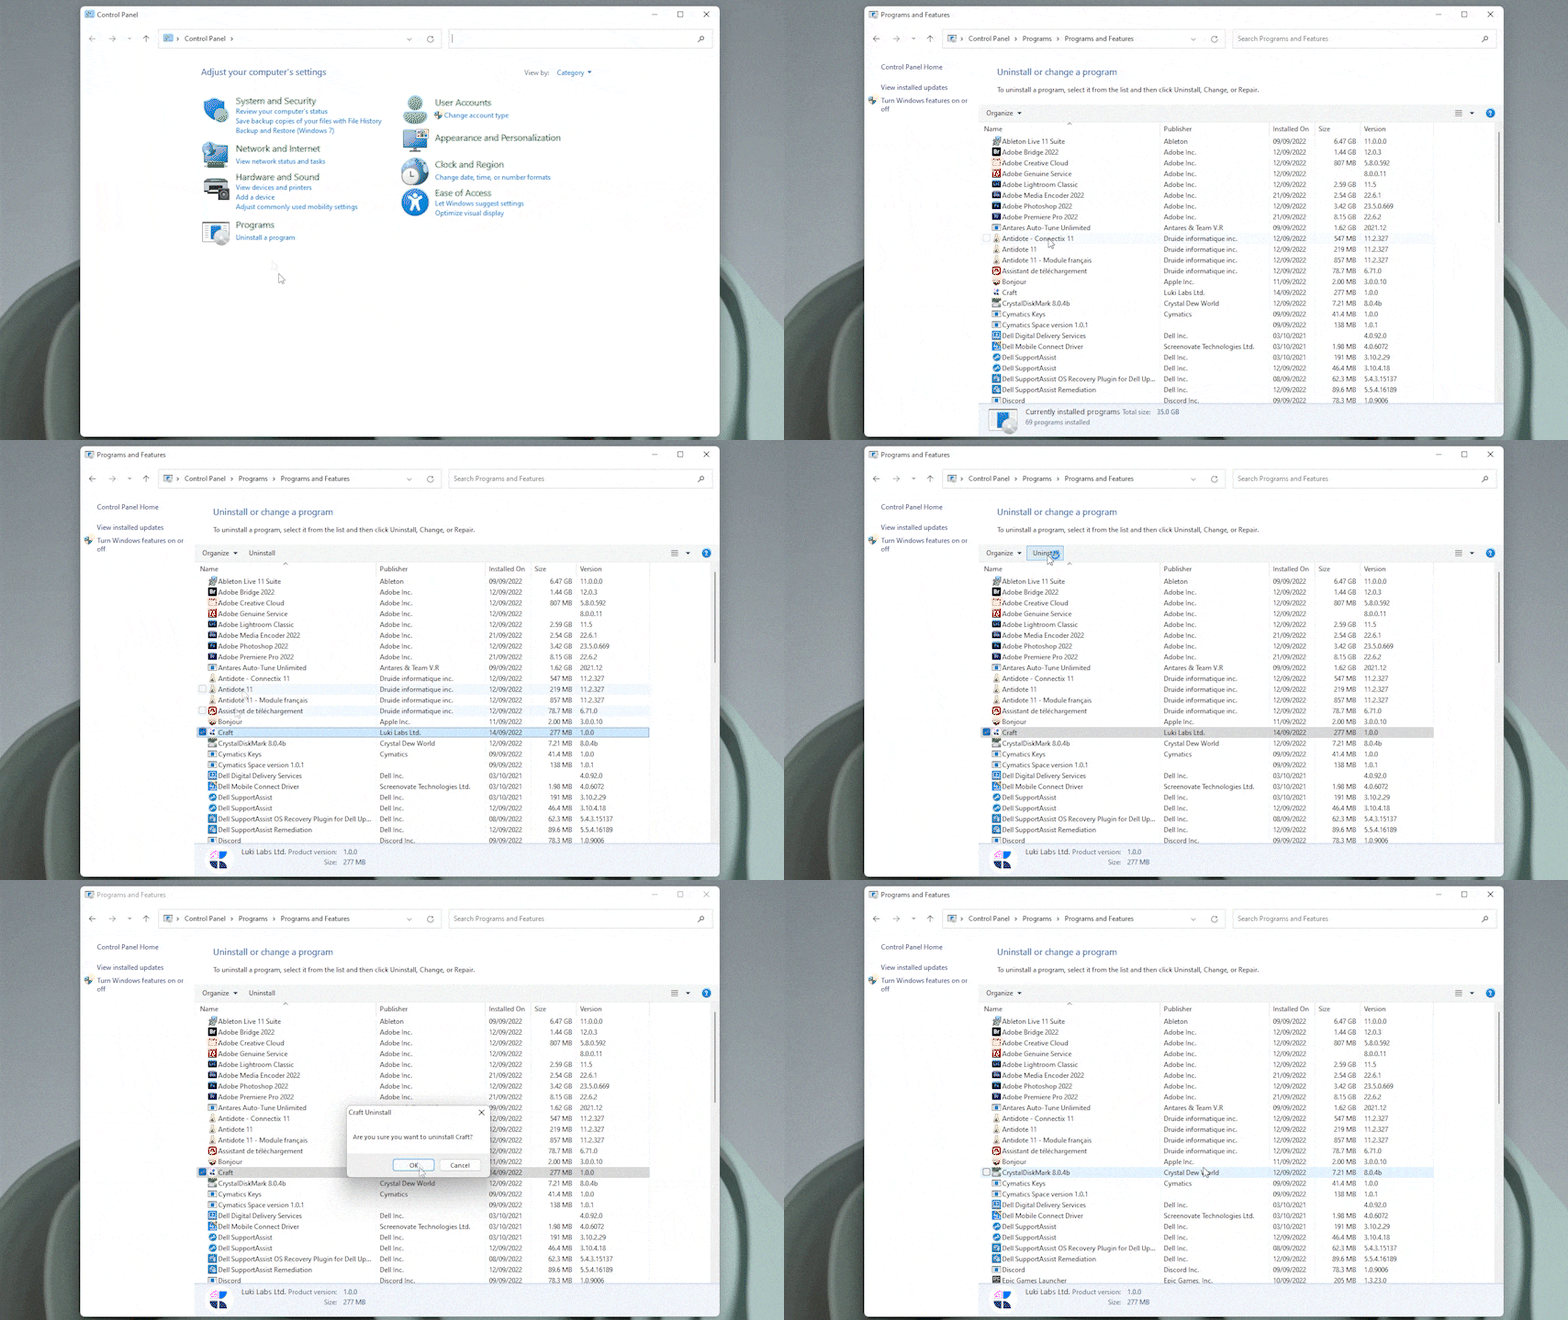
How to uninstall applications from Windows 11 via the Control Panel
If you want to avoid redundant manipulations and get straight to the point, simply follow the steps below to uninstall Windows 11 applications using the Control Panel.
- Open the Control Panel by searching for it in Windows Search.
- Click on Uninstall a program under the Programs tab to open the list of installed applications.
- Locate the program you wish to uninstall, then double-click on it.
- Alternatively, right-click on the application to get the uninstall options, or click once on the application to get the options in the menu bar above the application list.
- The Uninstall Wizard will then open, asking for your permission to run it. Click Yes to continue.
- Follow the Uninstall Wizard instructions to complete the uninstallation of the application.
The exact steps in the uninstall wizard vary according to the application. However, the overall process will be more or less the same, asking you whether you want to uninstall or repair the application, whether you want to retain the application data for future installations, and other similar options.


